Monday, November 21, 2011

update on life + Christmas craft

Hello friends!!

First, I am so incredibly sorry for the lack of updates and crafts on my blog. I have still been crafting but I just haven't had the time to sit down and put it on the computer unfortuantely! Let's see if I can fill you guys in on what I've been up to since August 28 AND show yall a new Christmas craft I just finished! :) Life since August 28.....


September:

My good friend Emma got married and it was gorgeous!

I took my last 2 PRAXIS tests and.... PASSED THEM!!! Yay! I have finally taken and passed all 4 of my PRAXIS tests :)

Bid Night and Delta Omega's 8 beautiful new members!

October:

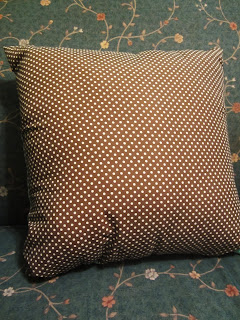
One of my best friends, Sarah Grace, and I went to multiple yard sales and found some great stuff! 

More great yard sale finds!

absolutely beautiful sunset at Lipscomb!

Bell Buckle Craft Fair for one weekend in October. I love the craft fair with my grandparents so much!

I was Mary Poppins for Halloween!

I took a new little for Delta Omega! Her name is Anna Spain and she's PRECIOUS :) These are all of the goodies I made her/bought her.

Part of my Delta Omega family! 2 of my littles, Anna and LauraBeth, and then my newest grandlittle, Bekah!

My newest little (Anna) and I went to a pumpkin patch! It was SO much fun!

I LOVE these pumpkins and actually bought the blue one for myself :)

On October 30, MY ROOMMATE GOT ENGAGED!!!!!!!! SO SO SO EXCITED FOR HER! :)

November:

Lipscomb Dodgeball... may sound silly but it's a huge deal at Lipscomb and pretty hilarious!

Lipscomb did a production of Hairspray and my roommates and I went to watch it. It was SO GOOD!!!

Nikki asked Sarah Grace and I to be BRIDESMAIDS!!!!! and of course we said YES!!!!!!!! :)


These are the precious 2nd graders I've been teaching this semester at Cole Elementary School. I have absolutely fallen in love with them! It will be so hard to leave!!!


and now I am just at home for the week because Lipscomb gets a full week for Thanksgiving break which I am SO thankful for! I've been relaxing, crafting, decorating, and sleeping! It has been so great :) Speaking of crafts, I think it's time to show yall the Christmas craft I've been working on! So I present to you......


The Picture Frame Christmas Wreath


It was so super easy to make!! All I did was paint a frame (mine was 10 x 14), string ornaments through twine and hot glue them to the back of the frame, and then cut a ribbon and make a huge bow and hot glue it on!!! I just love this and as soon as I get back to school this will be on our front door :) A picture frame as a wreath? Seems silly right? According to Pinterest, it's the trend! I drew my inspiration from here except I didn't make my ornaments like she did. I bought my ornaments and ribbon for super cheap at Michaels (love those 40% off coupons!) She also gives a tutorial if you need more direction on how to make this! :)

Well I think that's all for now, I'll try to keep this updated more regularly but between teaching, classes, and finals coming up.... it may not happen until Christmas break :) Love you all! Thanks for reading!!

Sunday, August 28, 2011

the return

Hey friends!
First, I am SO sorry I have been a terrible blogger. Things have been CRAZY around here since school started and I'm trying to figure out how I am going to manage it all :) However, crafting and DIY seem to be my sanity and escape these days so I plan on keeping these up which also means I'll be blogging about it! So no worries-- I'm not going anywhere!

So this project that I'm featuring today I actually made about a week and a half ago. I just haven't had time to blog about it yet! So here you are! This project was inspired by many different projects that I found on the internet as well as by a couple of things I already had.

___________________________________________________________


The Magnetic Board Cookie Sheet

This is the AFTER picture :) I love it!! It was pretty simple to make also. I was inspired to make it by this project here although they made their's a chalkboard and I just made mine into a magnetic board. I first started with a plain cookie sheet that I got at The Dollar Store for $1. I spray painted the cookie sheet a tiffany's blue with spray paint I already had. Then I attached some brown craft paper I already had (but could also be found at The Dollar Store) with Mod Podge. I just cut a piece that would fit the inside and brushed a couple layers of Mod Podge on to it with a brush. NOTE: The brown craft paper doesn't make it magnetic or anything... I just liked the way it looked. The cookie sheet itself is magnetic so you could put no paper or paper on it depending on how you want it to look.

Here is a picture of the magnets I already had at home that inspired me to make this magnetic board out of a cookie sheet. I just really wanted to use these magnets but they weren't really powerful enough to hold anything on the fridge. I made these magnets last year after my friend Michelle showed me how. They are so easy, cheap, and cute! Here is a tutorial here on how to make them.

I chose to embellish my magnetic board with some book page flowers! Since I already had the books and hot glue gun and sticks, these were free and so easy! You can find a tutorial on how to make them here and here.

and this is just a close up of another magnet and the picture I have on my magnetic board right now. I love this thing because you can put pictures on it or receipts or coupons or whatever you need to keep track of! Love it! Then to hang it up I attached twine I already had with hot glue to the back and tied it in a bow.

So overall, this project cost me 1 dollar for the cookie sheet since I had everything else I used at home already. So cheap! If you used an old cookie sheet you already had at home and then you had the other things as well, this could be free! That would be exciting!

___________________________________________________________


and there you have it! :) I already had a couple of other projects that I have made that I just haven't had time to blog about so be on the lookout for those soon as well! Love you guys! Thank you for your encouraging words and prayers as always! 


Sunday, August 14, 2011

wreaths wreaths wreaths

Hello everyone!
Well I am back from a wonderful weekend in Louisville! It was exhausting but so much fun! This was my first time in Louisville and it is SUCH a fun town! I absolutely loved it :) OH and there was this fabulous antique mall/flea market that Caitlyn and I found and it was wonderful! I got so many great things that will end up on the blog at some point!

So since school starts back in a WEEK (crazy!), I have been crafting away since I know I won't have much time to at school! Recently, I have been obsessed with wreaths on Pinterest. There are just so many cute ones!!! I'll share a few of my personal favorites then the one that I ended up making.


OBSESSED with this one... because it's yellow and grey of course!

I LOVE the bow on this one... not sure how the rest of the wreath is put together though!

IMG_5161
love love love... but would take FOREVER to make

LOVE the burlap!

for when I'm a teacher! so cute!

precious!

LOVE all 4 of them!


and this is the one I decided to make! :)

So also on Pinterest when I was looking for an inspiration for my wreath, I found a great way to make a cheap wreath form! The foam wreath forms that you find at craft stores can be very expensive. So instead go to the plumbing department at Home Depot or Lowes and grab a six foot long piece of foam tubing for $.97!! Snip the length you want with scissors and duct tape the ends together. Voila! You have a really inexpensive wreath form. Such a great idea!

This is what the foam tubing will look like except MUCH longer. This was after I had already cut off the piece for my wreath. Then you just duct tape the ends together and you have a wreath form!

and here is my wreath after!!! I LOVE IT! As I mentioned, I tried to make it look like the one above but I added my own touches and made it look a little different.

Here's a close up of the flowers I made. I also used burlap and made a few burlap flowers.

and another picture of the flowers!


This project was so easy! Once I made the wreath form out of the foam tubing from Lowe's, I just wrapped the foam tubing in an old tshirt and then hot glued it down. Then I made my rolled tshirt flowers and hot glued those on there. Then I tied a huge ribbon bow on it and that was it!! So easy!

Price breakdown:
-foam tubing from Lowe's: $0.97
-everything else (tshirts, ribbon): FREE

So this cost $0.97 total!! So awesome! So give this a try because it was easy, so much fun, and looks great! Happy crafting!! :)

Wednesday, August 10, 2011

a new look + craft time!

Hello friends!!!
I am so sorry it has been almost 2 weeks since I last posted. I have been working on many things but none are quite ready to feature on the blog yet. BUT exciting things have been happening around here!

-- "and it was all yellow" has a new look!! Yellow and grey, because I am currently obsessed with the 2 colors together :) I am very pleased!!

-- MY ERIN CONDREN PLANNER HAS ARRIVED. I could not be more happy with how it turned out!!!! It is PERFECT and the cover is, of course, yellow and grey... haha, I have a problem. Here is a picture of the cover:
love, love, love it!

-- Randomly my good friend Caitlyn and I got invited to go to Louisville this weekend for an Admissions recruiting trip and needless to say, we are SUPER excited!!! I'll let yall know how it goes :) 
 
In other news, today my baby sister left to go to college for her sophomore year :( I already miss her so much!!! As a goodbye gift, I made her this "framed burlap jewelry holder" that she's been wanting me to make. I followed this tutorial here but gave it a few of my own touches that I'll talk about further down! I sadly do not have a before picture but it was just a plain black picture frame that I got from the thrift store for 99 cents. Here is the after picture!


and there it is! Her name is Shawn, hence why there is a large "S" stenciled on there. This was super simple to make. I just spray painted the frame, cut a piece of burlap the size of the frame, stencilled an S on there, and then hot glued the rolled tshirt flowers to the frame! So simple! For further and more detailed instructions, visit this tutorial.

In the tutorial, the lady used a fancy die cut machine to make the stencil. But, I don't have one of those so I just printed a "S" off the computer, cut it out, and used the paper left over as the stencil. It worked perfectly! Just a suggestion for the stencil in case you don't have a machine to make a stencil for you :)

Oh and did I mention this project was super cheap! The frame was 99 cents at a thrift store (All Things Possible Bargain Center in Murfreesboro) and I already had everything else I needed at home!

Well I think that's it! Let me know if you have more questions about this project... I will be more than happy to help! Keep checking back because very soon I will have more exciting projects up that I have been working on! Love you guys so much!


Saturday, July 30, 2011

anthropologie inspired DIY lamp

Good afternoon!

I hope everyone is having a wonderful lazy Saturday :) I know I am! I have had another wonderful week... just thankful for the incredible friends I've been blessed with and enjoying these last few weeks of summer. School starts SO SOON! I cannot believe it but I am honestly really excited!

So for a long time I've been dying to make this lamp and last night I got the opportunity to! I had SO MUCH FUN! It was relatively easy and took about 3 hours. I know I said the pillow I last blogged about was my favorite project so far but.... I lied. THIS is definitely my new favorite project!!! I love it!

Here is the before picture. I bought this lamp for only $1.95 at a thrift store in Murfreesboro (Outreach Thift)!!! Such a great deal! AND it worked which made it even better.


and here's a better picture of just the lamp base. The lamp really wasn't that awful to begin with. It just really needed some sprucing up and some pizazz. So that's what I gave it!

and finally.... the after picture!!!! I love it!!! The shade is covered in burlap and has burlap ruffles hot glued to it. The lamp base is spray painted with Krylon's Blue Ocean Breeze spray paint.


Here's a close up picture of the burlap lamp shade.

I love love love it!!!


And there is my fabulous lamp! It was pretty easy! I followed this tutorial here for inspiration for my lamp and honestly kind of just copied their idea :) But hey, imitation is the highest form of flattery right? One thing I suggest from my experience is to follow their tutorial EXACTLY. Do EVERY step! It will make your life so much easier!

They didn't do a great job of explaining how to recover the lamp shade in the beginning so thankfully I found another fabulous video tutorial that explains exactly how to do it! You can find that tutorial here.

I ended up using about 2 yards of white burlap, 1/2 a can of Krylon spray paint, and about 15 glue sticks. Overall the project was pretty cheap too!

Price:
Lamp- $1.95 at a thrift store
Burlap- $7.44 for 2 yards at Joann's
Spray paint- $3.97 at Walmart
Hot glue gun, hot glue sticks, iron, scissors- I already had this all at home

So the total cost for my project was $13.36!! Not bad at all! I loved this project and I'm now kind of obsessed with recovering lamp shades and making new lamps. I'm already looking for new lamp ideas! :)

Well I hope you all have a wonderful rest of your day! Hopefully I'll be crafting more this week and posting another craft soon :) Love you guys!


Saturday, July 23, 2011

joy, erin condren, and my DIY pillow

Hi friends!
First, let me just tell yall, I had a FABULOUS week! When Nehemiah 8:10 says, "Do not grieve, for the joy of the Lord is your strength."....he wasn't joking! I have felt so much joy this week that is unwavering and completely God given. LOVE IT! :)

I took the Elementary Education Content Knowledge PRAXIS today and I think I did very well! So, I'll let yall know how I did once I find out! I find out on August 12th. Thank you all for your prayers and encouraging words! It means the world to me.

Another fun and exciting thing I did this week (well, in my opinion) was purchase a NEW PLANNER for the new school year!!! Let me tell you, it was QUITE the decision and debate on my part. Thankfully, I had a couple of friends at work to help me decide! I finally decided on the "2011-2012 LIFE Planner" from www.erincondren.com ...oh my goodness these planners are ADORABLE. Favorite parts include: you can choose your own colors and design for the front cover and she also PERSONALIZES it for you! I also love how it has a "morning, day, and night" section for each day. AND  it is 18 months so it will last me until December 2012. Which is GREAT! This will help bring my organization to a whole new level! EXCITED!!! My planner will look like this:


It will have this print.... with...

THESE colors! Yellow and grey of course :) Those are my favorite! Then it will have my full name on the front alternated in grey, yellow, and grey. I AM SO EXCITED!!!!!


If you would like to purchase an Erin Condren planner you can do so here. Not going to lie to you guys, they're really expensive for a planner. However, I found a $10 dollar off coupon that made the price better! AND I'm going to share the coupon with all of you :) The code is "WELCOME10". Just use that at check out and your purchase will be 10 dollars cheaper!

I've also been super busy today CRAFTING!!! Ahhhhh! I have been waiting for SO LONG to finally be able to craft again. So I also have a DIY project to share with you guys! EXCITING! 

So not long ago I went thrifting in Nashville (at Music City Thirft on Nolensville) and I found this awesome pillow that was in great condition! It was very cute but just needed an extra kick! So I remembered those rolled flowers I made a couple of posts ago and thought why not put one on a pillow?! So that's exactly what I did :)


Here is one of the BEFORE images. This is the front... it is more of a Tiffany's blue although you can't really tell from the picture!

 
Here is the back of the pillow. Brown and white polka dots :) SO cute! I debated for the longest time which side to decorate and I decided on the blue side since that would match my room stuff better.

and here is the AFTER picture! It is a white rolled flower with a rhinestone in the middle. For some reason the flower looks light pink, but it is white!


Another picture of the pillow :) I am SO proud of it!


This is possibly my favorite DIY project yet. I followed the rolled flower tutorial here and it was SUPER easy! The only thing I did different to put it on the pillow was I actually made the flower on the pillow instead of making the flower in my hand and then hot gluing it to the pillow once I was done. Does that make sense? I hope so! Then at the end, I just hot glued a rhinestone in the middle! It was so easy... no sewing involved... just hot glue and an old tshirt I had in my drawer!

Price:
Pillow- $2.98
Fabric- FREE (old tshirt I had)
Materials- FREE (I already had hot glue, hot glue gun, scissors, rhinestone)

So in total this only cost me $2.98 and it is so cute! I love love love this pillow and cannot wait to use it in my apartment this coming semester :)

I hope you guys had a great week and are working on some wonderful projects! Let me know what you've been working on-- I LOVE hearing about other people's work! If you have questions about any of my projects, feel free to let me know and I will answer them! I know they can be confusing :) Love you all and thanks for reading!