Saturday, June 25, 2011

crafting Saturdays make me happy :)

Hello all!
WHEW what a crazy week it has been. IMPACT was this past week (a Christian camp at Lipscomb) and as much as I love it, it wears me out! I was so thankful for a restful, relaxing weekend to recharge me for the coming week.

Today has been wonderful! I woke up, ate some breakfast, watched some TV, and surfed the net for my next craft project. I came across several that I am planning on doing very soon and cannot wait to share with you guys! But for now, I have one very cute project to share that I worked on today!

I got this tutorial from Jones Design Company. If you haven't checked out her blog you will definitely want to! It's where I draw most of my inspiration from and where I get most of my tutorials and ideas from :) Anyway, today I decided to make a couple "rolled fabric flowers" and use them in multiple ways. You can find the tutorial to make your very own "rolled fabric flower" here.


First, I just grabbed an old tshirt I didn't want anymore to use as my fabric. Of course, I chose yellow. :)

Then, I followed the tutorial that you can find here to make the flower. It looks difficult but is actually SUPER easy and only takes about 5 minutes. You just twist and roll the fabric, hot gluing it down along the way. Super easy! (The tutorial I linked to has more detailed instructions).


I could have just left the flower as is and hot glued it to anything or used it as decoration. BUT I decided I wanted to make a hair pin! So I hot glued my flower onto a bobby pin and stuck it in my hair!


Photography done by my sweet sister, baby Shawn. I then decided to make another one using other fabric I just had lying around my room. The flower below is smaller and thicker but I like it! I can't decide what I want to do with it yet. Use it as decoration? Make another hair pin? Add it to a belt? Glue it to a pin and wear it on my shirt? Put it on my purse? The possibilities as endless with these little things! You can make them bigger or smaller too depending on what you want to use them for. Jones Design Company has a ton of ideas on how you can use them too (you can find it on the tutorial).


I LOVE LOVE LOVE these little flowers and plan to use them everywhere now! They are SO easy and super fun! 

Cost: FREE (I had the fabric, scissors, and hot glue gun required to make the flower)
Time: 5 minutes
Difficulty Level: Super easy!

What a great project :) Now go out and make your own! I hope you all have a wonderful Saturday and a great rest of the weekend! I'm going to see Bad Teacher tonight with friends and am quite excited. I'll let yall know how it is! Love!


Monday, June 20, 2011

marvelous, fantastic, great, happy, awesome, !

Good evening all!
I am sorry it has been awhile but I do have a new craft to share with you which is exciting!!! All of my crafts have a story behind them and of course I'm going to share it with you!

On Saturday, my sister and I were bored at home and I needed a "pick me up" so we went to my favorite thrift store in Murfreesboro (All Things Possible Bargain Center). It's disgusting and you have to dig for things but usually you can find GREAT things! Shawn was less than thrilled but what else is new :) As we get to the store, I see a sign that says "Everything is 50% off!" AHHHHH! I WAS SO EXCITED!

So lately I have been dying to make a chalkboard. I bought the chalkboard spray paint FOREVER ago (Krylon Chalkboard Spray Paint) and it's been killing me just sitting in my closet. So while Shawn and I were shopping at the thrift store, I found the PERFECT frame that was just right for my chalkboard!


BEFORE:
 LOVED the shape of the frame and it's HUGE which is perfect for a chalkboard! Ignore the hideous duck painting currently in it.


AFTER:


I tried to give a close up of the frame so you could see the distressed detailing I attempted!


So there it is! My very own chalkboard which will be great for my apartment next year. The difficulty level was extremely easy! Below are a few steps and tips to help you along the process:

  1. Since the chalkboard paint has to sit for 24 hours, I went ahead and did the chalkboard paint first. I just followed the directions that were on the spraypaint can and it worked perfectly!
  2. I then started my frame. I knew I wanted it to look "distressed shabby chic like" but didn't know how to do it. So I searched on Google and found a fantastic tutorial that helped me tremendously and worked great! You can find the tutorial here.
  3. I chose to paint the first coat a color called "Malted Mint" and then put a coat of plain white over it. In between the mint color and the white color, I followed the tutorial and rubbed candle wax where I knew I was going to distress. I HIGHLY suggest doing this because it makes the 2 colors seperate and not both rub off when you use the sand paper to distress.
  4. After I finished distressing my frame and my chalkboard had sat for 24 hours, I assembled my chalkboard and I was done! It really was so simple!
I suggest following the tutorial I linked to very closely when distressing the frame. I also suggest following the directions on the spray paint can as closely as possible. You dont want to stray from the directions during this project!

This project was, as always, CHEAP. The frame was $1.34 (since it was 50% off). The chalkboard paint was $3.79. Everything else I already had! So total this project cost me $5.13. AWESOME!

So give it a try! Chalkboards are so much fun and so useful. You'll love it! :) Thanks for reading!!

(Side note: Shawn claims that the only words I use on my blog are: marvelous, fantastic, great, happy, awesome, and exclamation points. I told her to stop hating on my happiness! Hence why my title for this post are those words. Haha!)

Sunday, June 12, 2011

and the jewelry holder winner is.....

So I didn't think I would make a decision quite this soon BUT I got in a crafty mood last night and decided that, why not, I would give one a try!

Shabby Chic Dangly Earring Display Holder
I decided I was going to try this one but put my own spin on it. You can find the tutorial for this jewelry holder here. And now.... here's mine!


BEFORE. Sorry it has paint on it already. I started painted before I realized I didn't have a before picture!

AFTER. This is a picture of my jewelry holder with no earrings!


And here is my jewelry holder with earrings! I am VERY happy with how it turned out!


Here is a quick tutorial on my frame. I forgot to take pictures along the way!
  1. I started with a cheap 8x10 frame from the thrift store. I took the glass and backing out. I then decided to paint it because it was that tacky gold coloring that was beginning to rust. I used an antique white paint that we already had in our garage.
  2. I used 2 coats of the paint and I didn't prime or anything before. I also painted the back and painted the inside of the frame because if it was going to sit up against a mirror, I didn't want the back to be ugly in the reflection of the mirror. But I don't think it's necessary! Just me being picky :)
  3. While I was waiting on my frame to dry, I took the cardboard backing that comes in the frame and began to make my jewelry holder. I used scrapbook paper I already had and measured a piece that would cover the whole carboard piece.
  4. I then measured and cut pieces of twine that would fit horizontally across the piece of cardboard. I made my pieces of twine tight so that my earrings wouldn't hang down too much. I got the twine awhile ago for $1.79 at Walmart in the rope section. I use it ALL the time!
  5. I then taped the pieces of twine to the back of the piece of cardboard. I just used normal scotch tape and it held up fine!
  6. Then I put the piece of cardboard in the frame and put the backing back on and TADAH! I have a new jewelry holder!!!!
Cost: $1.99 (This was just for the frame. I already had everything else I used!)
Time: about 30 minutes

Overall, I am VERY pleased with how it turned out! I also like that I used neutral colors so it will match anything if I decide to use it when I go to school :) Thanks for reading everyone! Happy crafting!!


Saturday, June 11, 2011

long awaited return

Hello friends!
I am SO sorry that it has been so long since I last blogged. This whole week I have been in a constant state of studying for one of my PRAXIS tests that I took today. I took the Reading Across the Curriculum: Elementary PRAXIS and let me just tell you... it was HARD! However, I think I KILLED it and I was very proud of myself :) I'll let you guys know if I passed it or not once I find out my scores!

I did take a night off of studying this week to have a date with the boyfriend :) We saw the Hangover 2 (per Alex's request of course). It was disgusting as I expected. BUT it was funny and, dare I say it, just as funny as the first one! Sometimes sequels can be awful, you know. But it really was a funny movie.

Since I've been studying like crazy, I haven't had time to craft :( However, I have craft ideas and I can't wait to craft this week!!! Lately I've been looking for ideas for jewelry holders. I'm in desperate need of a new jewelry holder and I thought... why not craft one?! So that will be my new project. Here are the ideas I've found so far on the internet:


This one is different but I'm obsessed with it! I may steal our extra cheese grater out of the cabinet... shhhh don't tell my mom :)

OBSESSED with this one. I want, I want, I want. However, I have been searching high and low for an old candelabra and cannot find one ANYWHERE. :(

[frameturnedjewelryholder3.jpg]


LOVE LOVE LOVE. love. I don't have an old dolly or piece of lace laying around though and have looked at thrift stores and found nothing.

DIY: Framed Jewelry Organizer

Shabby Chic Dangly Earring Display Holder
LOVE this one and it looks SO simple!!! May try this!


So those are my ideas I currently have for a jewelry holder! Comment and let me know what your favorite is or if you have another idea I haven't found yet! Feel free to steal one of the ideas here and make your own too :) I'll keep yall updated on what I pick!

Love :)

Wednesday, June 1, 2011

third craft: the lamp

Good evening friends! Today I have a wonderful transformation to share with you all and I could not be more excited!

So on Monday for Memorial Day while everyone was at the beach, pool, outside, enjoying the sunshine, etc.... my sister and I went to see Bridesmaids. We've been dying to see it and if you go during the day it is only $6.50 to see a movie in Murfreesboro (it is 10 dollars or more to see a movie in Nashville... LAME!) So we trekked to the movie theatre. Bridesmaids was HILARIOUS. Raunchy, witty, and fabulous. Next on my list to see is Hangover 2. I am just on a raunchy movie roll this week!

Anyway, I'm off topic. I say all of that because we got to the movie about 30 minutes early and there just happens to be a fabulous THRIFT STORE next to the movie theatre! So naturally I drug my unwilling sister into it. There were SO MANY wonderful things!!! I ended up walking away with a lamp base, an antique yellow bottle (sounds awful I know but it is cute!), and some lavender striped fabric. I bought the lamp base because it had an amazing shape and I saw so much potential in it! Ideas just reeled in my head! I just had to transform this lamp! So I did just that. It was a pretty cheap project and took about 2 hours. Here are my before and after pictures:

This is my before picture. Look at that amazing shape the lamp had!!! I know, the wood is AWFUL. That's why I decided to transform it!

...and here is the after! I'm pretty much obsessed with it! (And you can see the antique yellow bottle next to the lamp that I also bought at the thrift store... cute, right?)


Once I got the lamp home I laid down some newspaper and got to work! Here is my tutorial on how I transformed my lamp (even though it was not difficult at all!):
  1. I first sanded down the lamp. Since it was "wood", I felt this was necessary.
  2. Then I taped off the power cord and other parts of the lamp I didn't want to paint (just to be safe).
  3. I then painted 2 coats of primer onto the lamp. I'm not really sure if I needed to do this or not but it did help the paint go on better.
  4. Next I painted the lamp with 2 coats of the teal paint, let it dry, and it was done!
The lamp base was honestly the easiest part of the whole project. That lamp shade is what gave me the hardest time! I went back and forth on what to do with it. I finally decided to just hot glue scrapbook paper to it. Not sure how long this will last because I am not completely in love with the shade but it is good enough for now! FUTURE REFERENCE: If you are recovering a lamp shade, DO NOT get one with pleats. If you can, purchase a cheap drum shaped lamp shade. It will make your life so much easier and it is so much easier to recover! The pleated lamp shade I bought was so hard to get the wrinkles out of the paper and I ended up giving up and just leaving a lot of the wrinkles and bubbles (although you cannot really tell). The lamp shade was a khaki color to begin with so I just bought a khaki print scrapbook paper and put it in between the pleats with hot glue. Cheap, cheap way to transform a lamp shade but I had a hard time with it.

Overall, I am very happy with how the project turned out! My sister now wants my lamp because her room is teal, khaki, and light pink and my lamp is teal and khaki (funny how she wants it now but didn't want to go with me to the thrift store :) hehe).

Sadly, this project was not free. BUT it was pretty cheap!!! The lamp base at the thrift store was $2.50, the lamp shade was $3.99 at Ross, and the paper for the lamp shade was $1.30 at Hobby Lobby. I already had the teal paint, primer, hot glue, and paint brushes at home. So this lamp totaled $7.79. Not bad at all!!!

So if you are bored and are wanting to transform something, check the thrift store! There are always great cheap finds if you just look :) Good night everyone!!!

Monday, May 30, 2011

second craft: flower key holder

Thank you so much for the nice compliments on my blog! This is something I've been dying to do and I'm so excited I finally have the time.

To start off this beautiful Memorial Day, I'm going to share a craft my sister and I completed last night. We had SO much fun! My sister isn't really a crafter so I ended up basically doing hers for her but she did add some touches of her own.

I found this tutorial online to make a book page flower key holder. It looked easy enough and once again, I had all the materials at home so we decided to give it a try! Here are our final products:

This is mine. Yellow accents, of course :)

This is my sister's (Shawn). She decided to burn the edges of her flower (consequently almost burning down the house).


You can find the tutorial for this project here. It was very simple to do! As always, I altered a few things to give it my own touch and to use things I already had at home. These are the changes I made:
  1. We didn't have wire hangers at home but we had those cheap clear ones you get at department stores. So Shawn and I cut off the metal part of one of those and just used that! It worked just as well and I like the silver look of the key holder part.
  2. We decided to embellish ours a little more than the tutorial did. We decided to make initials in Microsoft Word with our favorite colors and print them off and put those in the center of our flowers. It was very easy and I like the personalization it gives!
  3. Since we didn't use the wire hangers, we weren't able to make a loop out of wire on the back to hang our key holders. So me being the fabulous and crafty woman that I am (sarcasm), I decided to make a hook out of cardboard. It worked just as well if not better because it could lay flat against the wall where the wire would make the key holder hang away from the wall.
  4. Shawn decided to burn the edges of her flower by just placing it over a candle. I didn't like this look so I chose not to do it but I think it turned out great for her!
and that is how we made our cute book page flower key holders! I even tested them with a pretty heavy set of keys and the key holder held up! I would say this was a huge success and it was EASY.

As always..... Cost: $0. LOVE cute, LOVE free, LOVE crafts!

Happy Memorial Day everyone! Enjoy your day off with your families! :)

the first craft of summer

So this past weekend my mother, my sister, and my brother all went to the beach while my dad and I stayed at home. No, I was not happy about this, but I had class (I'm taking Bowling at MTSU... it is as funny as it sounds!) and a wedding to attend so I just could not attend the beach trip. It was very sad but also gave me some great time to CRAFT! Crafting is one of my favorite hobbies that I rarely have time to do due to school. But now that I am no longer in school, the crafter is back!

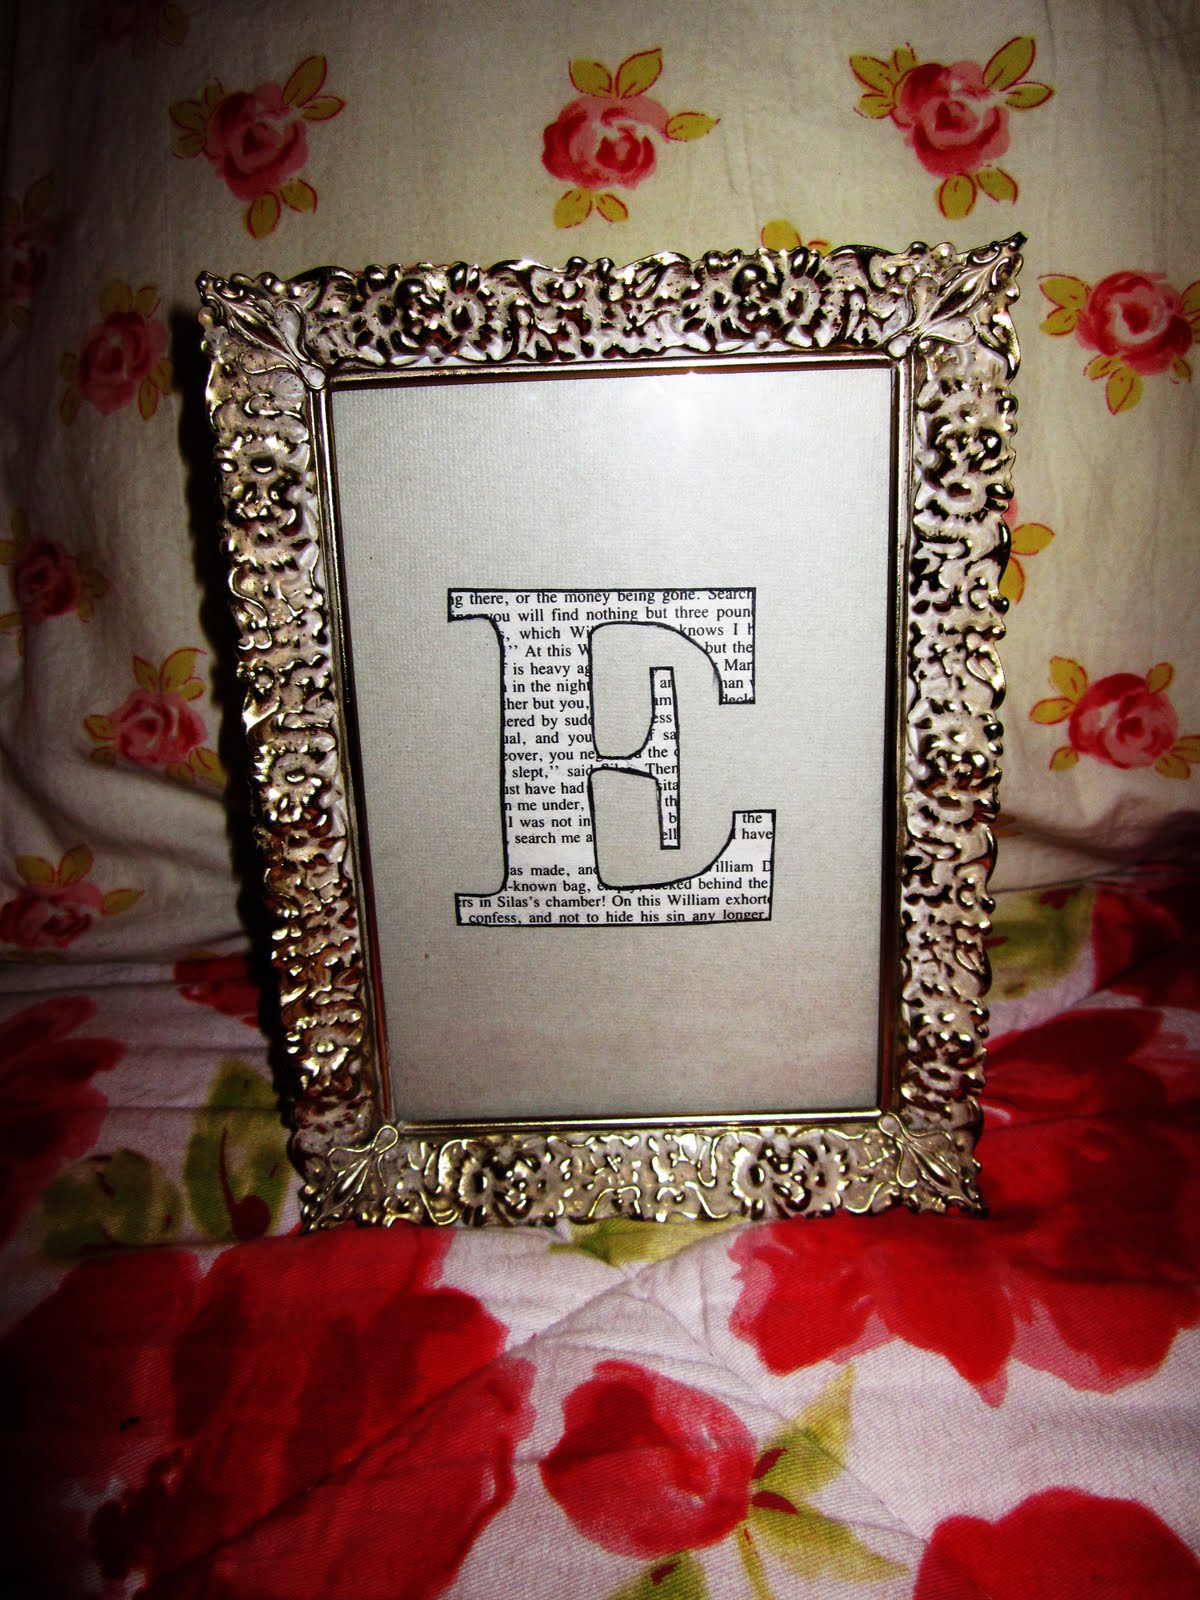
I follow this FANTASTIC blog called Jones Design Company. She has 4 children and still manages to do everything she does. She's practically super woman! She has all kinds of design and do it yourself tutorials as well as things you can purchase. I pour over her website daily. I just cannot get enough! Anyway, a couple of days ago she blogged about how to make monogrammed art. It looked easy enough so I gave it a whirl and I LOVE the way the 2 pieces I made turned out. I made an "E" for myself and then an "H" for my family to display.

I realized once I put the letter on the paper that the colors were too similar. So I chose to carefully outline the "E" with a sharpie. I like how it turned out! It matches the frame nicely.

I actually like this one that I made for my family more than my own :) I'm just obsessed with yellow!


I won't blog about how I made these since Emily gives a pretty simple and easy to follow tutorial in her blog mentioned above. However, I will say that I changed a quite a few things from her original tutorial:
  1. I used scrapbook paper instead of fabric and it worked just as well.
  2. I also printed off a letter from Microsoft Word and then hand traced the monogram onto a book page instead of printing directly on the book page like she mentioned and this seemed to work just as well also.
  3. I left off the "established" date she adds to hers.
  4. I didn't matte mine.
I chose to venture from her tutorial and make it my own and I had a lot of fun! and the best part of this project: Cost- $0 (I had all the materials needed at home already) Don't you just love free and cute?! ME TOO! :)

So if you are bored one day and have nothing to do, give this a try! It is SUPER SIMPLE and very inexpensive! I recommend!